


Keep your desk supplies organized with recycled tin cans by making these sweet and totally metal (get it?) pencil holders inspired by Aggretsuko and her favorite co-workers!
About Me
Irene is a designer, illustrator, and maker based in the San Francisco Bay Area. A lover of color, whimsy, and all things vintage, Irene strives to cultivate joy with all her creations. When not making or designing, she's probably baking something sweet (and immediately eating it). Follow her DIYs and art at @yourfriendirene.
This craft was fun to create and super easy to put together. Once completed, they make any work desk feel organized and sweeter from 9am-5pm. Be sure to collect five cans to make your very own Aggretsuko, Fenneko, Gori, Haida and Washimi pencil holders!
Now let's get started!
Materials:
- 5 empty tin cans, various sizes
- white, blue, light blue, yellow, black, red, and pink felt
- scissors
- hot glue gun

Directions:
1. Use soap and water to clean out each of the cans. Let dry.
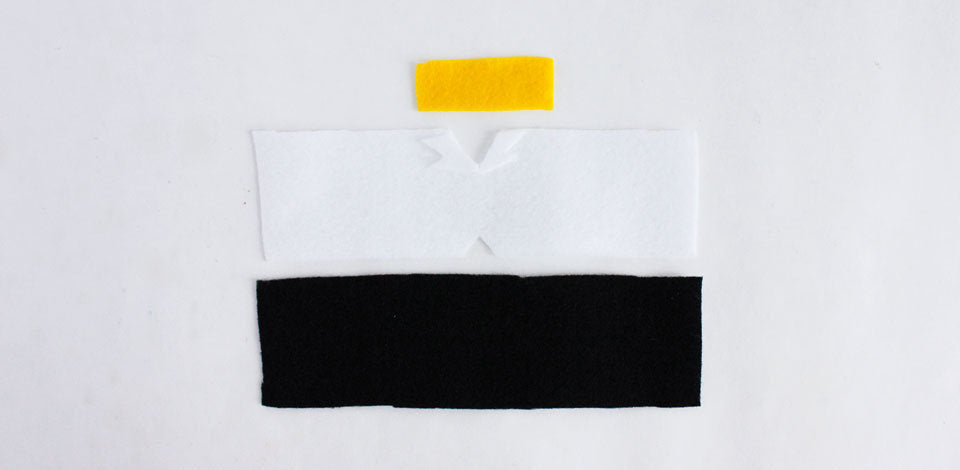
2. To make Aggretsuko: Place a tin can onto a sheet of blue felt. Trim to fit the circumference and ½ the height of the can. This strip will be the skirt. Cut another strip of blue felt that fits the circumference of the can but is about ¼ inch wider than the first blue strip. This strip will be the blazer. In the middle of the blazer felt piece, cut out a small triangle on one of the long edges and cut out a wider triangle on the other long edge. Cut out a small yellow strip of felt. Cut out two “collar-shape” pieces out of white felt. Glue the skirt piece of felt around the bottom half of the can using a hot glue gun. Glue the yellow piece of felt on the top of the can. Glue the blazer part of the felt over the top half, making sure that the yellow felt is exposed through the larger triangle cut-out. Glue down the two while collar pieces by the edges of the wide triangle.
3. To make Fenneko: Follow the directions for Aggretsuko. Cut out a small rectangle out of light blue felt and a small U-shape piece out of darker blue felt. Glue those pieces together to form her cell phone. Glue the cell phone on the side of the pencil holder.


7. Let pencil holders dry and cool completely before using. Enjoy!

Please note: Sanrio has invited, but does not necessarily endorse, the comments of this guest blogger. The contents of this blog are the copyrighted works of the guest blogger, except that Hello Kitty and other Sanrio characters remain the sole intellectual property of Sanrio, and are used with permission from Sanrio. Any ideas or instructions for homemade products featuring Hello Kitty or other Sanrio characters are authorized for personal use only. A separate license from Sanrio is always required to sell or distribute any products featuring Hello Kitty or other Sanrio characters.