


Celebrate Gudetama and “Month of Meh” with these grocery store inspired Gudetama DIY candles. We’ll be crafting canned quail eggs, milk, eggs, and tinned tamagoyaki. Your home will smell so gude!

Hi, my name is Clara, and I love to create cute crafts, treats, and food art, especially for my kids. Bright colors and adorable characters make me happy. Although I majored in science and currently work as a pharmacist, art has always been my passion. I believe it’s never too late to live your dream. You can find more fun creations on my Instagram @clarasham22.
DIY Candle Supplies:

-
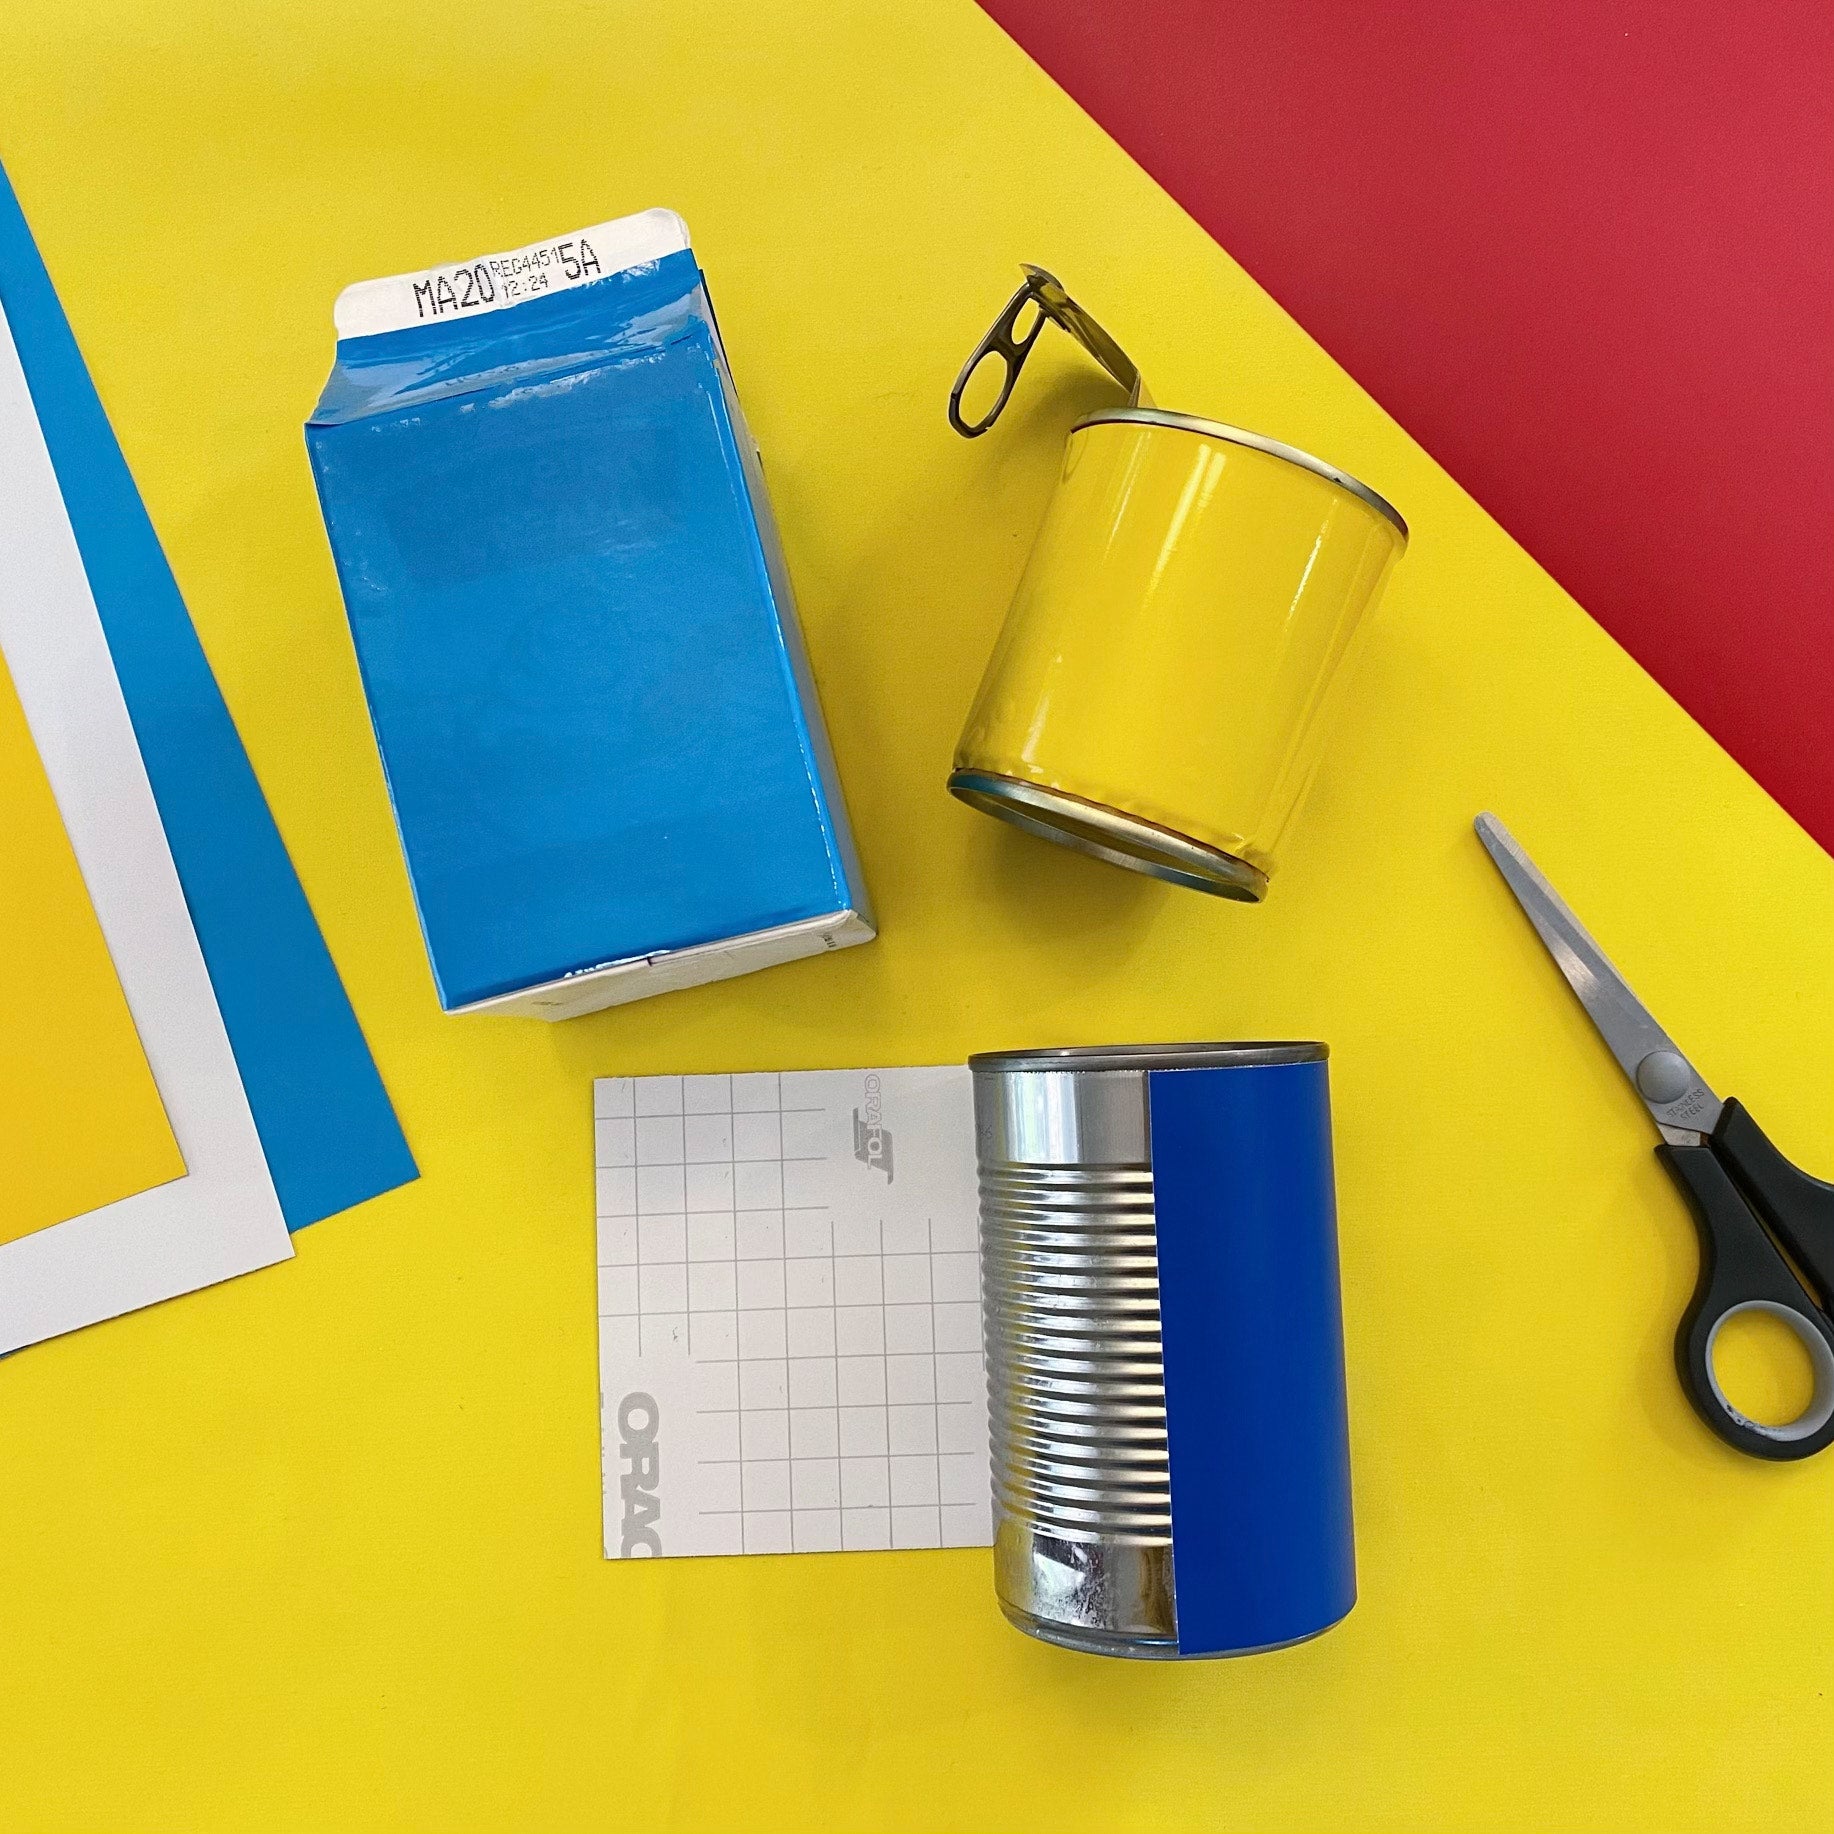
2 empty soup cans, labels removed
-
1 small empty tin can with ring pull lid
-
500ml empty milk carton
-
6 large eggs
-
½ Egg carton
-
1 Glass votive
-
10 Candle wicks
-
2lb Soy wax
-
Yellow candle dye
-
2 oz Fragrance oil (e.g. vanilla or bacon scent)
-
Wick centering device or toothpicks/skewers
-
Hot glue gun
-
Microwave safe container (preferably plastic with a spout)
-
Stirring utensil
Instructions:
-
Tap the top of the eggs with a metal spoon to create an opening and empty egg contents into a bowl to save for future cooking. Clean out the eggshells, milk carton, and cans. Dry thoroughly.
-
Hot glue the wicks to the bottom of the egg shells, tin cans, and glass votive. Use a centering device or toothpicks/skewers to keep the wicks centered.

-
To estimate the amount of dry wax needed, measure the volume of your containers, then double it. Place in a microwave safe container and heat on high for 4 minutes. Heating time may vary so do not leave unattended. Remove with pot holders or a towel. Carefully stir and place back in the microwave if necessary, at 30 second intervals until fully melted.
-
For the eggshell batch, add the yellow candle dye to the melted wax. Stir until uniform.

-
Add fragrance oil (general rule is 1oz for every lb of wax) to slightly cooled melted wax and carefully stir for 2 minutes.
-
Pour into your candle holders, making sure the wicks stay centered. Let cool overnight.
-
Trim the wicks to ¼ inch.
Now it’s time to decorate.
Craft Supplies:
-
Grey acrylic paint
-
Paint markers - black and white
-
Permanent markers - red, green, black, brown
-
Vinyl Permanent Self-Adhesive Sheets - white, yellow, light blue, dark blue, red, brown, black
-
Red Sticker Letters
-
Scissors
-
Cardstock - yellow, light green, white
-
Glue
-
Red pencil crayon
-
Yellow marker
-
Air dry clay- dark and light yellow, white, beige, brown
Instructions:
1 Cut the vinyl sheets by measuring the height of the cans and milk carton. Carefully wrap it around as smooth as possible to cover all areas. Use the red and dark blue to cover the 2 cans of quail eggs. Use the light blue for the milk carton and white for the inside flaps. Use the yellow for the tamagoyaki tin.
2 For the quail egg cans, cut a strip of white vinyl around ⅔ height of the can and wrap around each can. Cut egg shapes from the brown vinyl. Use an egg silhouette image from the internet as a template to help cut out your shapes. Draw cracked lines and Gudetama’s face with brown and black permanent marker. You can use the white paint marker to draw highlights. I backed each brown vinyl egg with black vinyl paper to create an outline. Peel off the backing and stick to your cans. Use the yellow cardstock to cut oval can labels, then handprint “gudetama” with a brown marker. Glue the labels onto the white vinyl before attaching.

3. For the milk carton, cut three ½ inch wide strips of white vinyl to attach to the top. Use the red alphabet stickers to create an arrow and spell MILK. The letters can be trimmed down to fit the carton. Attach to a 4.5cm x 7cm white vinyl rectangle. Cut a small banner and a 2cm egg shape with the yellow cardstock and handprint “gudetama” and “500ml” with a red marker. Draw and cut out a starburst shape with the white vinyl. Attach all the pieces to the milk carton. For the milk glass, draw his face on the votive with a black paint marker.

4. For the tinned tamagoyaki, use the green and yellow cardstock to draw and cut out a plate and tamagoyaki shapes so that it fits diagonally. Shade the tamagoyaki with a red pencil crayon and white marker, then draw gudetama’s face with a black marker. Decorate the can with two ¼ inch wide white vinyl strips. Cut a rectangular label from white paper and write gudetama in Japanese “ぐでたま” vertically with a yellow marker. Attach the paper pieces to the can with glue.

5. For the egg carton, paint it all grey and let dry. Use your green marker to create a border, then handprint “organic eggs gudetama” with a thin black marker. Cut out 4 egg shapes from the white vinyl, draw the faces, and adhere under the border. For the eggshells, draw Gudetama’s face with a black paint marker.

6. Lastly, create some fun clay pieces for your candles. You can make a Gudetama cup hanger by first shaping the white clay onto the votive’s rim, then adding Gudetama’s body hanging beneath. Use the beige and brown clay to form quail eggshells. To form the milk box clip, attach some white clay on top of the milk carton and shape the backside of Gudetama on top. The tamagoyaki can be shaped with the lighter yellow clay by adding little arms and legs to small rectangular blocks. Don’t forget to add his butt crack with a modeling tool or butter knife. Use the white and black paint pens to add features.

Wait 72 hours before lighting your candles. Remember to follow all candle burning safety rules. Remove clay figures inside the cans before lighting.
And now you have an EGG-cellent assortment of "Month of Meh" Gudetama candles! Enjoy and share with your favorite lazy friend.
Please note: Sanrio has invited, but does not necessarily endorse, the comments of this guest blogger. Any ideas or instructions for homemade products featuring Hello Kitty or other Sanrio characters are authorized for personal use only. A separate license from Sanrio is always required to sell or distribute any products featuring Hello Kitty or other Sanrio characters. The contents of this blog are the copyrighted works of Sanrio.